Last updated: September 17, 2026 · 10–12 minute read
Hotel Bench Cushion Specification Guide for Designers and Procurement Teams
A hotel bench cushion is a fitted furnishing component, not a generic soft good. The best results come from a clear measurement reference, sample fit check, documented materials and a handover plan that makes installation and future replacement practical.
A fitted bench cushion must be specified around the actual joinery and service workflow.
Quick answer: what should a hotel bench cushion specification include?
A hotel bench cushion specification should include the intended use, dimensioned drawing or template, finished thickness, cover and filling references, seam and attachment details, section layout, measurement tolerances, cleaning approach, installation guidance, packing and inspection criteria. For curves, corners and built-in joinery, a fitted sample is usually more reliable than dimensions alone.
Start with the furniture and operator workflow. The cushion must fit the joinery, support guests comfortably, align with interior finishes, be installed correctly and be maintainable once the property is operating.
1. Measure from fixed reference points
Long bench cushions can magnify small measurement errors. Establish fixed reference points on the built-in frame: wall face, front edge, corner, centre line, end return, radii and any obstruction. State the measurement units and show exactly where length, depth and thickness are taken. Do not rely on an overall room dimension when a cushion must fit inside a framed recess.
Photograph the bench with a tape measure visible at key points. For a curved or irregular shape, use a full-size paper or board template when practical. Mark orientation clearly—left/right, window side, wall side or section number—and include all cut-outs for columns, power outlets, brackets or armrests. This reduces interpretation between the design team, factory and installer.
Measurement checklist
- Finished overall length and depth, plus thickness at agreed points.
- Inside and outside radii, straight runs and angled returns.
- Frame edge condition, overhang requirement and gap allowance.
- Location of joints, piping, seams, zippers, straps or non-slip underside.
- Section numbering, orientation and installation access.
Our bench cushion measurement guide provides a buyer-ready drawing checklist.
2. Decide whether one piece or several sections serve the project better
A single long cushion can create a clean visual line, but it may be difficult to ship, carry through a finished hotel, remove for cleaning or replace after damage. Several sections can make handling and service easier, but their joins, pattern matching and orientation must be designed intentionally. The best division often follows furniture modules, access paths or natural visual breaks.
Discuss each section with the operator. Can it pass through doors and lifts? Can a housekeeper remove it without tools? Will the sections look balanced when installed? Are replacement covers or spare inserts possible without changing the appearance of neighbouring pieces? Include a simple section map in the order file and mark each packed item accordingly.
3. Specify the support system and finished comfort
Bench comfort is influenced by the deck beneath the cushion. A solid timber base, a slatted base and a sprung platform require different consideration. Record the support surface along with desired seat height and finished thickness. A cushion that feels correct in a sample room can feel too firm or too high on a different frame.
Specify foam or filling by functional result rather than a single number. Note thickness, layering, wrap, edge profile and expected seat use. A breakfast banquette with short-duration use may need a different build from a lobby window seat where guests linger. Approve the assembled cushion on a comparable support. Read our hospitality material guide for cover and foam decisions.
4. Design covers for cleaning and repair
Hotel operations should influence the cover construction. A fixed cover may offer the cleanest profile; a removable cover may simplify replacement or specialist cleaning. Either choice needs to be tested on the real shape. Confirm zipper access, how the cover is removed and re-fitted, whether piping is retained, and whether the seam layout avoids high-contact or visibly prominent areas.
Name the fabric code and colour reference, describe fabric direction or pattern repeat, and approve a large cutting under project lighting. For a long bench, discuss dye-lot allocation and material continuity. Specify cleaning guidance that reflects the selected supplier’s instructions, not generic advice copied from another fabric. The cover construction guide explains the details to inspect.
5. Select a practical attachment method
Attachment should prevent unwanted movement while allowing intended maintenance. Options may include non-slip underside, ties, hook-and-loop systems, concealed fixing points or a friction fit within a recess. The appropriate choice depends on cushion weight, guest use, cleaning access, frame material and appearance. Any attachment should be shown in the drawing and proven during sample fitting.
Do not add an attachment detail late in production. It can affect seam placement, fabric consumption, comfort and installation. Confirm whether hardware is supplied with the cushions, pre-installed on the bench or provided by the site contractor. Record quantities and positions for shipment inspection.
6. Approve a fitted sample before bulk release
A fitted sample gives the project team a chance to check gaps, overhang, corner fit, seat height, cover tension, seam alignment and access. Install it on the actual frame if possible, or on a faithful mock-up. Photograph the sample from normal guest viewpoints and measure it at the same points shown on the drawing. Record every revision in one current specification.
Factory testing begins with material-code confirmation and first-off comparison to that retained sample. During production, check cut direction, dimensions, workmanship, closure, attachment and section labels. Before shipment, compare SKU counts, installation maps, care notes, carton marks and packing protection with the purchase order.
PROJECT SUPPORT
Need a bench cushion specification that can be sampled?
Send your drawing, frame photos, dimensions and cleaning requirements. We will help organise fit, materials, sections and attachment into a clear development brief.
Send a Seating Drawing →7. Prepare installation and replacement from the start
Receiving teams need to know which cushion goes where. Provide a numbered diagram, section labels and any necessary attachment hardware. Use labels that can be read during installation but do not disturb the guest-facing surface. When cushions are packed by section, carton marks should match the installation schedule and packing list.
Plan replacement strategically. A small spare quantity, replacement covers or retained fabric may be useful where a bespoke colour or long lead time makes later matching difficult. Confirm ownership and storage of any residual material in writing. Keep the approved sample record, material codes and project drawings for future orders.
Common hotel bench cushion mistakes
- Measuring only overall length and ignoring inside returns or edge conditions.
- Using one continuous cushion where access and cleaning require sections.
- Selecting fabric without checking it on a full-size fitted sample.
- Leaving attachment, zipper access or orientation to factory interpretation.
- Shipping sections without a matching installation map and labels.
- Ignoring replacement strategy for a bespoke material or colour.
Freeze site measurements at the right project milestone
For hotel fit-out, timing of measurement is as important as the measurement itself. Confirm when joinery, wall finishes, skirting, outlets and fixtures are complete enough to become the cushion reference. Measuring too early can create a perfect cushion for a frame that no longer exists after final finishing. Record the measurement date, site contact and drawing revision so the factory knows which information governs production.
If the programme requires early production, identify what is provisional and build a controlled verification step into the schedule. A trial section or fitted sample may be the safest way to protect a long bespoke bench when final site dimensions cannot be frozen at the first drawing issue.
Run an installation rehearsal before shipment
Use the approved sample or a representative section to rehearse how cushions will be unpacked, carried, oriented, attached and inspected on site. Invite the installer and property representative when possible. Check whether labels are visible at the right stage, whether hardware is accounted for and whether the section map is intuitive. This gives the receiving team a practical process rather than a carton of similar-looking items.
Document any installation-specific requirements in the packing plan: carton sequence, section numbers, protective removal order and care note. For a project with several floors or zones, make the labels match the room or location schedule used by the site team.
Keep a replacement-control record
Once installed, retain the final sample photos, fabric and fill codes, drawing, section map and any fitting notes. If a cushion is damaged or a property is expanded, the buyer can request a defined replacement rather than describe a visual match from memory. For bespoke materials, decide whether to keep spare covers, spare filled sections or residual fabric under agreed storage terms.
This record is also useful during renovation. It shows which details were selected for comfort, cleaning and visual continuity, allowing a future design team to make deliberate improvements instead of unintentionally changing the product.
Prepare a site-fit validation before bulk production
Long hotel benches create risks that are easy to miss in a basic length-and-width quote. A wall may not be square, a timber base may have a visible radius, armrests can interrupt the cushion line and a nearby column may change the usable length. Ask for measured drawings, photographs with a scale reference and, for complex shapes, a full-size paper or board template. Identify the finished edge that faces the room, the underside that rests on the frame, any cut-outs, split lines, ties, hook-and-loop locations and the direction in which a cover should be fitted.
Where the bench is long or sectional, divide it into logical production pieces rather than assuming one continuous cushion is best. The right split is a balance between visual continuity, lifting weight, access, shipping carton size and the ability to replace one damaged section. Mark each piece with a consistent location code in the drawing, sample photographs, packing list and care record. This enables installers to identify a left return, center section or curved corner without relying on memory at a busy site.
Test installation as part of sample approval
A bench cushion sample should be tested on the actual base whenever possible. Confirm not only that it fits when first placed, but that seams align with the intended visual breaks, fastenings reach their anchor points, cover tension remains acceptable at corners and the cushion can be removed for cleaning or maintenance. If an installation crew will receive the goods rather than the design team, provide a clear orientation photo and labeled sketch. The sample review should identify whether slight furniture variation needs a defined tolerance or whether the base must be corrected before production.
Include comfort and service questions too. For a breakfast bench, test how the cushion feels after ordinary seated use and whether the chosen fill or foam returns as expected. For a lobby banquette, inspect the visible front edge, top seam and any piping under the project lighting. If covers are removable, let the operations team practise the intended removal and refit process. Observations should be written into the approval record rather than held only in a verbal site conversation.
Control delivery, installation and future replacement
During packing, keep sectional components separated and labeled. Carton marks should show the project reference, SKU or location code, quantity and handling information agreed with the buyer. At shipment inspection, check dimensions on selected pieces, location labels, visible construction, packing count and the correspondence between cartons and the packing list. A well-organized delivery reduces the chance that an installer opens every carton to search for one corner piece.
After installation, retain the approved dimension table, final material code, labels and photographs of each location. If the hotel later requests a replacement cover or one section of a modular bench, the supplier can reproduce the intended component without remaking the whole set from incomplete information. Treating the bench cushion as a controlled fit-out component makes the initial project smoother and gives operations a realistic route for maintenance and replenishment.
Use a handover checklist at installation
Before the installation team begins, reconcile the carton map with the site drawing and confirm that the furniture base has not changed since measurement approval. Stage components by location code, keep the approved orientation image available and inspect each piece before fastening it in place. The checklist should cover correct SKU and location, visible cover condition, seam or piping orientation, fastening points, fit against the base and any protective packaging to be removed. If a part does not fit, stop and compare it with the released drawing rather than trimming, forcing or swapping it with a similar-looking component.
Once installed, photograph representative finished locations and record any agreed site adjustment. These records help operations staff identify components later and protect the factory if a future furniture alteration is confused with an original product issue. For a phased hotel project, they also allow the next area to begin from verified installation information rather than recollection. The result is a controlled handover from factory packing to a functioning guest-space installation.
Conclusion: make the bench cushion a controlled fit-out component
Hotel bench cushions succeed when design, procurement and operations work from the same fit, material and installation reference. Define the furniture accurately, choose a section strategy, approve the complete sample, document attachments and create a handover plan. That turns a visually important soft furnishing into a maintainable, repeatable part of the project.
Photography plan for this guide
Use original factory photography where possible. The prompts below are production references for realistic imagery, not claims about a specific order.

Position: Below the introduction
Caption: A fitted bench cushion must be specified around the actual joinery and service workflow.
AI prompt: Photorealistic premium boutique hotel interior: long tailored neutral bench cushion fitted precisely on custom wood banquette joinery, sophisticated European-American interior design, warm natural light, no people, realistic woven upholstery texture, no logos or text, 16:9.
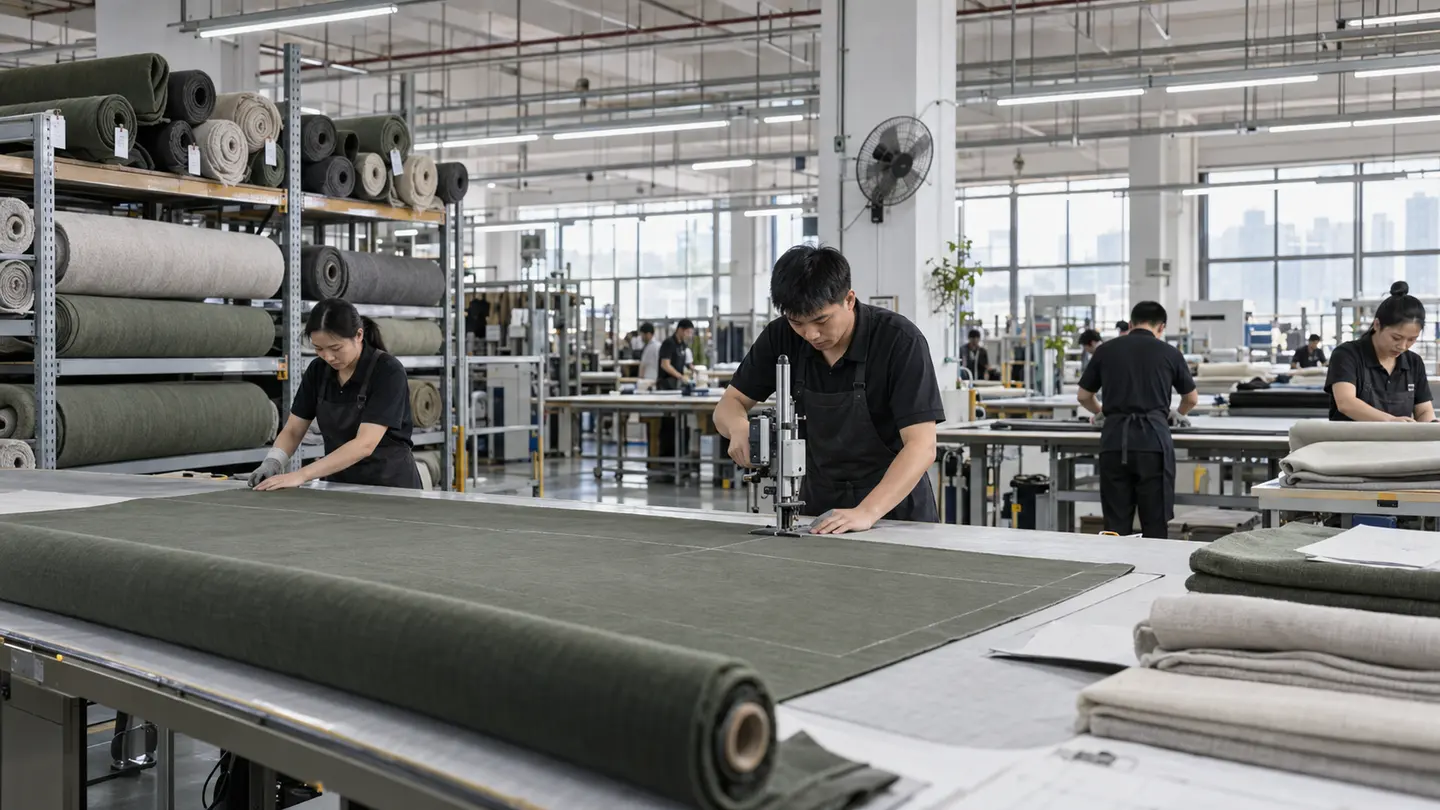
Position: After “Measure from fixed reference points”
Caption: A template and marked fabric direction reduce interpretation before cutting begins.
AI prompt: Documentary realistic Shenzhen cushion factory image: Asian textile worker positioning a curved paper template on upholstery fabric at a cutting table, measuring tape and small non-readable reference card, clean organized workshop, natural industrial light, no logos.

Position: After “Approve a fitted sample before bulk release”
Caption: Finished dimensions and seam alignment are checked against the approved bench-cushion reference.
AI prompt: Photorealistic factory quality-control photo: Asian inspector measuring a tailored long bench cushion and inspecting piping alignment on a worktable, neutral fabric, clean Shenzhen workshop, natural light, no text or logos.
Frequently asked questions
How thick should a hotel bench cushion be?
Thickness depends on desired seat height, support deck, comfort objective and bench use. Define the finished height with the cushion installed and approve the proposed build on a comparable frame.
Should a long hotel bench cushion be sectional?
Sections can improve transport, installation, cleaning and replacement. Decide based on furniture modules, access routes, visual joins and the operator’s workflow, then document orientation clearly.
How do I measure a curved bench cushion?
Use fixed reference points and a full-size template when practical. Include curve radii, end returns, obstructions, orientation and frame photos; approve a fitted sample before bulk production.
Do hotel bench cushions need removable covers?
Not always. Choose removable covers when the cleaning and replacement workflow benefits from them, and test zipper access and re-fitting on the actual shape during sampling.
What should be checked before hotel bench cushions ship?
Check dimensions, fit reference, cover material, workmanship, attachment, section labels, installation map, care information, SKU count, packing and carton marks against the approved specification.
Enquiry popup plan
Trigger: Show after 40% scroll, after 30 seconds on page, or on desktop exit intent; suppress after a completed submission.
Popup title: Request a hotel bench cushion brief
Copy: Share your seating drawing and project requirements. We will send the key fit, material and installation fields to confirm before sampling.
Fields: Required: Name, Email. Optional: Company, Project Type, Message. Do not request a phone number.
Button: Request Bench Cushion Brief
Plan fitted seating for a hotel project
Email info@cushionnook.com or use the enquiry form to begin a sample-ready hotel bench cushion discussion.
Get a Quote →